Getting Your iOS App with Passwordless Sign in Approved by App Review
Jan 15, 2021
Apple’s app review will often require you to provide login credentials to a test account so that the reviewers can access all features in your app. Lately, the so-called passwordless type of login has become more and more common, especially since Apple has started catering more for auto-filling one time passwords (OTPs) sent via SMS. This can, however, lead to some headaches when submitting your app for review, and in the worst case may lead your submission to be rejected. This article will describe making a web app that can let Apple reviewers log in to your app using a passwordless SMS setup. We will use Twilio as our SMS provider, and implement our app with Vapor and deploy it to Heroku.
If you’re mainly interested in trying this out for yourself you can head over to the GitHub repository, where you will find what you need to get quickly up and running.
Prerequisites
This article is based on using Twilio for sending out SMS OTPs, but you can probably make some adjustments to make this work with almost any SMS service. This article will not cover any of the initial setup for the passwordless login, there are plenty of other guides for that out there. From this point on we will assume that your app has a working login mechanism that somehow uses Twilio for sending out OTPs.
The main idea behind this solution is to leave as much as possible of your existing application and infrastructure untouched. It is always risky to introduce special cases and backdoors into your application, and so we’re striving to leave all the application code completely untouched when allowing Apple’s reviewers to log in to a test account. To achieve this we require that there is a phone number that reviewers can log in with. You can try to purchase a number with Twilio, or you can use your own, it really doesn’t matter as long as it’s a phone number that you can try to send a message to.
We will instruct the reviewers to log in to your app normally, inputting the provided phone number and then being led to a screen where they’re supposed to input the OTP sent by SMS. At this point, you’re probably wondering how to make sure that the reviewers can log in with a valid OTP. In most applications, this OTP is a randomly generated number and is only valid for a couple of minutes, so that means that we’re reliant on using some sort of automated mechanism for providing this OTP to the reviewers.
The Broad Strokes
We’re basing our solution on Twilio’s message history API. This API lets us query what has been sent (or tried to be sent) from the message service we’ve set up. For our needs, we can query this API and get back the latest message sent to a specific number and display that on a website. This means that there are no special cases in our app or backend code to handle the login to the test account, everything works as normal. The only thing needed to make this setup work is a small web-application that can fetch the message containing the OTP and display it on a website.
The Web App
Twilio’s message history API has SDKs for many different languages, but since this is an article written mainly for Swift developers I’ve decided to write this web app in Swift, using Vapor as the server-side framework. If you haven’t used Vapor before I suggest you go to their website and install Vapor before you come back here and read on.
To get started we will first create the skeleton of our Vapor application:
vapor new passwordless-login --no-fluent --leaf
This sets up a brand new Vapor server application that uses Leaf (Vapor’s templating language). Open the Package.swift file with Xcode to get started adding functionality to our app.
To begin with, we will add a file to make sure that the project compiles on Linux.
cd passwordless-login/
touch Tests/LinuxMain.swift
git commit --amend --no-edit
Getting Data from Twilio
Messages from Twilio comes to us as JSON, and we need to create a model for this. Put this file in Sources/App/Models/Message.swift
Then we’ll implement a networking client that can fetch data from Twilio. To match the recommended structure of a Vapor project we’ll use the protocol name TwilioRepository, and make an implementation TwilioAPIRepository that fetches messages over the network. This file is put in Sources/App/Repositories/TwilioRepository.swift. We will start by adding a skeleton of the repository.
This skeleton sets up the URI with query parameters that ensure we only get one message for the specified phone number. It also specifies the Authorization header so we can authenticate with the Twilio API. Now we can modify the latestMessage() function to make the network call and deserialize the response into our Message type.
We also need to create a file for the type TwilioConfig. Put this file together with the message model, in Sources/App/Models/TwilioConfig.swift
Note that we’re adding an extension to instantiate this struct from the environment since we don’t want to check in any identifiers, auth tokens or hard code any phone numbers.
Let’s commit these changes.
git add .
git commit -m "Add repository for Twilio messages"
With this in place, we can proceed to set up a simple page that displays this info.
Setting up the Main Page
Start by adding a file in Sources/App/Controllers/MessageController.swift
This will render the Leaf file under Resources/Views/index.leaf with the provided data. Note that we're also filtering out the message if it's older than 120 seconds. In our case, this is the validity time of our OTP, but feel free to change this value if needed.
To wire up this route go to Sources/App/routes.swift and update the routes function.
We will also have to change Sources/App/configure.swift to pass the Twilio config.
Then head over to the Resources/Views/index.leaf file and replace its contents with the following:
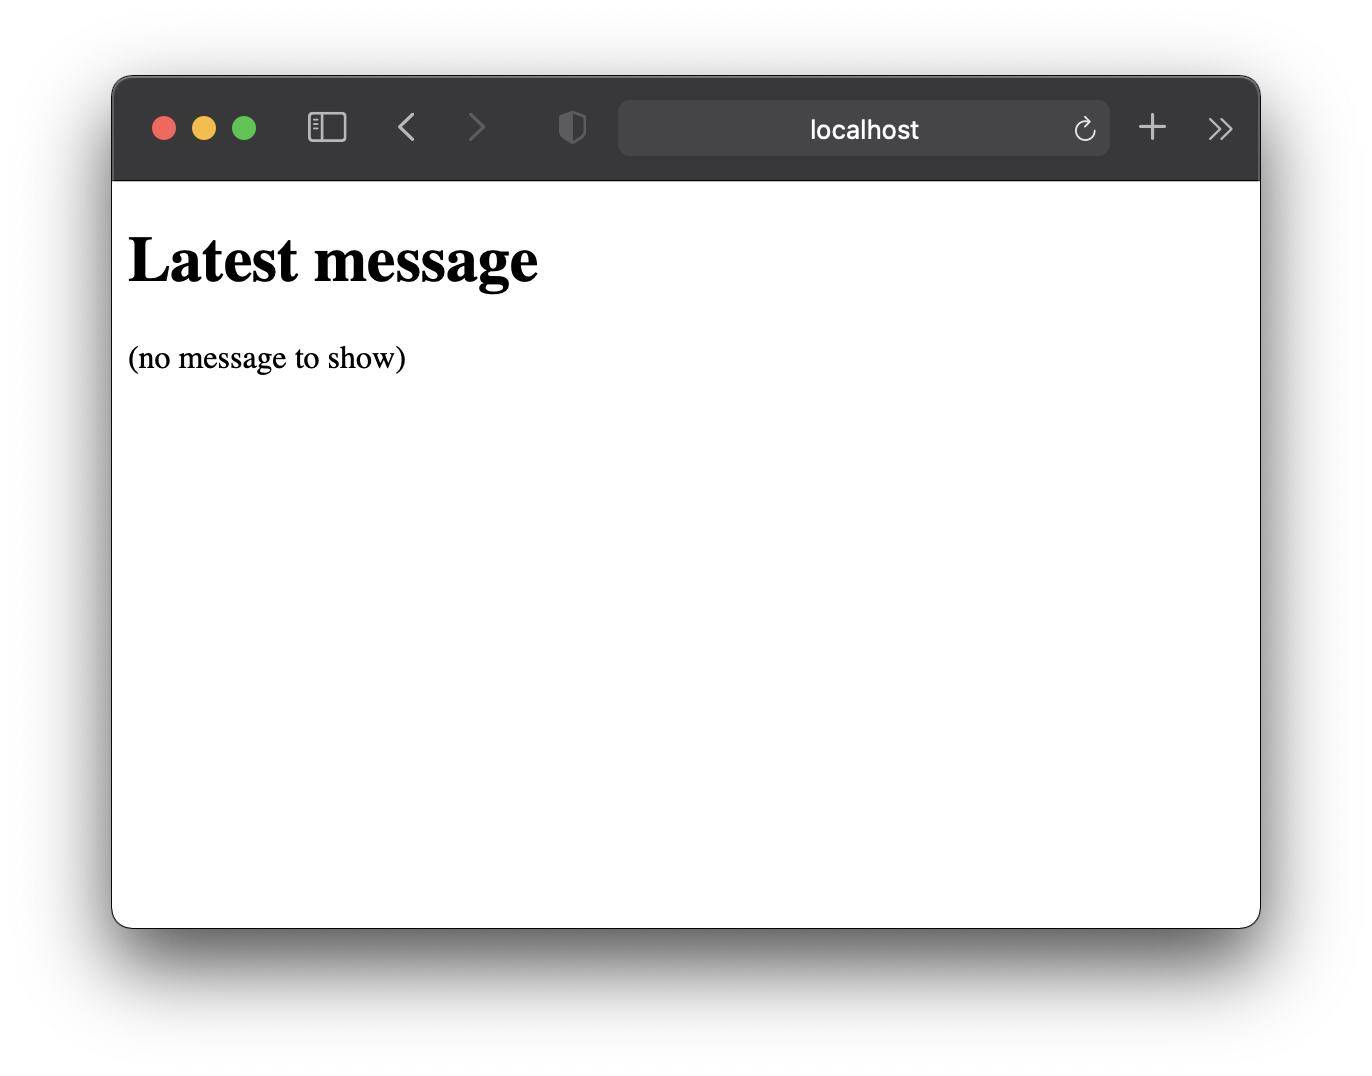
You probably aren’t going to win any design awards with this page, but it gets the job done.
To wrap up this step we will commit all our changes.
git add .
git commit -m "Add controller and route for fetching latest message"
Authentication
We want to protect this web page with authentication. We can make sure that the web page is only live we have a version in review and make sure that it’s only used for test accounts. But ultimately, it’s still a security issue and we should password protect the site to be as secure as we can.
Vapor has some built-in support for basic authentication, but unfortunately, they have not implemented the part that triggers the username/password prompt in web browsers, so we will roll our own implementation of this. Our implementation is heavily based on this answer on their GitHub issue.
We won’t bother with a database or anything like that, since there’s only going to be one set of credentials for this site. So we will be using environment variables for this too. Create a new file in Sources/App/Models/BasicAuthConfig.swift:
To set up the basic auth itself we will add a new file Sources/App/Middleware/UserAuthentication.swift, and add the following code.
This actually doesn’t to any authentication yet, this first version only adds a user object to the request object before it is delivered to our controller. To make sure that the authentication is handled correctly we will change the respond(to:chainingTo:)function to do the following:
To make use of this we will have to modify our routing, change the routes function in Sources/App/routes.swift.
This will make sure that the middleware adds the appropriate headers whenever a controller tries to access a route protected by authentication. We also use a User.guardMiddleware() that makes sure that there is a User object present in all requests coming to the routes protected by these authenticators.
Remember to modify the call to the routes function in the Sources/App/configure.swift file.
Then commit these changes to git.
git add .
git commit -m "Add authentication to protect web page with basic auth login"
Running locally
You probably want to do local build and run by now. Since we’re using environment variables you need to set those up before running the app. You can do this by adding a .env-file in the root of the repository with the following content.
TWILIO_ACCOUNT_SID=<twilio-account-sid>
TWILIO_AUTH_TOKEN=<twilio-auth-token>
TWILIO_TO_NUMBER=<phone-number>
BASIC_AUTH_REALM=Messages
BASIC_AUTH_USERNAME=<username>
BASIC_AUTH_PASSWORD=<password>
Make sure to replace the bracketed values with real values for your setup. The identifier and token for Twilio can be found in their console.
Deploying to Heroku
There are a few choices for deploying a Vapor application, one of the simplest is through Heroku. They have built-in support for running Vapor applications, so there are very few steps to get our little web app live. If you don’t have the Heroku CLI installed yet you can start by installing it via Homebrew.
brew install heroku/brew/heroku
Then make sure you are logged in with the CLI.
heroku login
Set up
We need to create a Procfile that describes how to run our application to Heroku, and a .swift-version file that specifies our Swift version. At the time of writing the highest supported version of Swift on Heroku's servers is 5.3.
echo "web: Run --env production --hostname 0.0.0.0 --port $PORT" > Procfile
echo "5.3" > .swift-version
Heroku’s deployment process is based on pushing your code to a git remote that they control. Use the Heroku CLI to first create the app in the Heroku system, and then add the Heroku remote to our git repository.
heroku apps:create <your-application-name> --buildpack vapor/vapor
heroku git:remote -a <your-application-name>
Make sure to replace <your-application-name> with a real application name.
Environment
Since we’re using environment variables (or config vars in Heroku’s terms) in our application we need to make sure that they’re set up in Heroku’s system. We will do this by using the CLI:
heroku config:set \
 TWILIO_ACCOUNT_SID=<twilio-account-sid> \
 TWILIO_AUTH_TOKEN=<twilio-auth-token> \
 TWILIO_TO_NUMBER=<phone-number> \
 BASIC_AUTH_REALM=Messages \
 BASIC_AUTH_USERNAME=<username> \
 BASIC_AUTH_PASSWORD=<password>
Deploying
To wrap everything up we will commit our changes and deploy to Heroku.
git add .
git commit -m "Add Heroku build files"
git push heroku master
The deployment process is going to take a few minutes of building and getting everything ready.
If you need to start or stop your app you can run the following commands.
heroku ps:scale web=0 // stop
Heroku ps:scale web=1 // start
Wrapping up
And with that, you have a live and working web app that can help you get your app approved by app review. The final application lets us keep our app and backend code intact, without having to introduce any back doors or special cases to let reviewers log in. Apart from deploying this web app you also have to make sure that the reviewers can successfully log in using the provided phone number in your system.
To check out the final source code for this project you can go to the GitHub repository.