Creating namespaces for named colors in Xcode
Nov 26, 2021
Xcode's feature for named colors has been around for a few years now. When it first was introduced it was a big improvement on the existing system for vending colors, but one of the major drawbacks that were never addressed is the problem of naming safety. The current initializer takes the name as a String, which leads to a couple of problems. The most obvious one is that it is prone to typos, but perhaps more importantly, it does not guarantee that the name will actually resolve to a UIColor instance in the future if for instance the color is renamed.
#colorLiteral
Xcode does have a built-in mechanism for working with color literals, namely the #colorLiteral(red:green:blue:alpha:) statement, but unfortunately this suffers from a major drawback. The color literal only refers to the RGBA values and not the name of the color. This means that the literal will stay unchanged if the source color changes. The color literals will also be hard to use in apps that support both dark and light modes.
This leads us to think that we need to find a better way for structuring and naming colors in apps that use named colors and asset catalogs.
Design systems
Another motivation for structuring and naming our color use is when working with design systems. Most designers worth their salt will have a clearly defined color palette – not only for the primary, secondary, text, and similar colors but also hairline borders, shadows, and similar. This means that there will be at least a handful of colors to work with, and structuring our color system is starting to make more and more sense.
First stab – static properties
Usually, this results in developers declaring their colors in some way, for instance as an extension on UIColor:
extension UIColor {
    static var brandMain: UIColor { UIColor(named: "brandMain")! }
    static var brandSecondary: UIColor { UIColor(named: "brandSecondary")! }
}
This solution is quite a bit better, but there is still room for improvement. The name of the color is written twice, or three times actually, if we count the name in the asset catalog as well.
Second stab – enum-backed initialization
To get ease the work of declaring things multiple times, and help implement changes and additions to our color palette we can use String-backed enums to name our colors.
enum BrandColor: String {
    case main, secondary, text
}

extension UIColor {
    static func brand(_ name: BrandColor) -> UIColor {
        guard let color = UIColor(named: name.rawValue) else {
            fatalError("Failed to load named color")
        }
        return color
    }
}
To be even more thorough we can also use the more complicated initializer
UIColor(named: name.rawValue, in: Bundle(for: PrivateClass.self), compatibleWith: nil)
with an empty class named PrivateClass (or any other class that belongs to the same bundle) to be able to use these colors outside of our bundle.
This leaves us with a pretty solid solution for handling colors in our app. This can be more than enough for a lot of apps. But, sometimes we can run into situations where we have a very large number of colors to handle. For instance, there could be the main palette, containing three or four colors used to color UI elements. Then there could be a second palette to handle text, maybe three or four colors there as well. Additionally, we could have a third palette for data visualizations, like cake diagrams and similar. This could add another six or seven colors. To add to this complexity, we will in many cases also run into situations where a text color is almost the same as a UI element color, only slightly darker. And this is what motivates our final improvement.
Third stab - Namespaces
A well-known feature in asset catalogs is to use folders to organize the assets. The folders are not actually folders though, they only help with grouping. Each asset's name still has to be unique to avoid naming collisions. But there is a more obscure feature we can also use – folders can actually provide namespaces. To enable this we'll have to select the folder in the left list and tick the Provides Namespace box at the top-right menu of the screen.
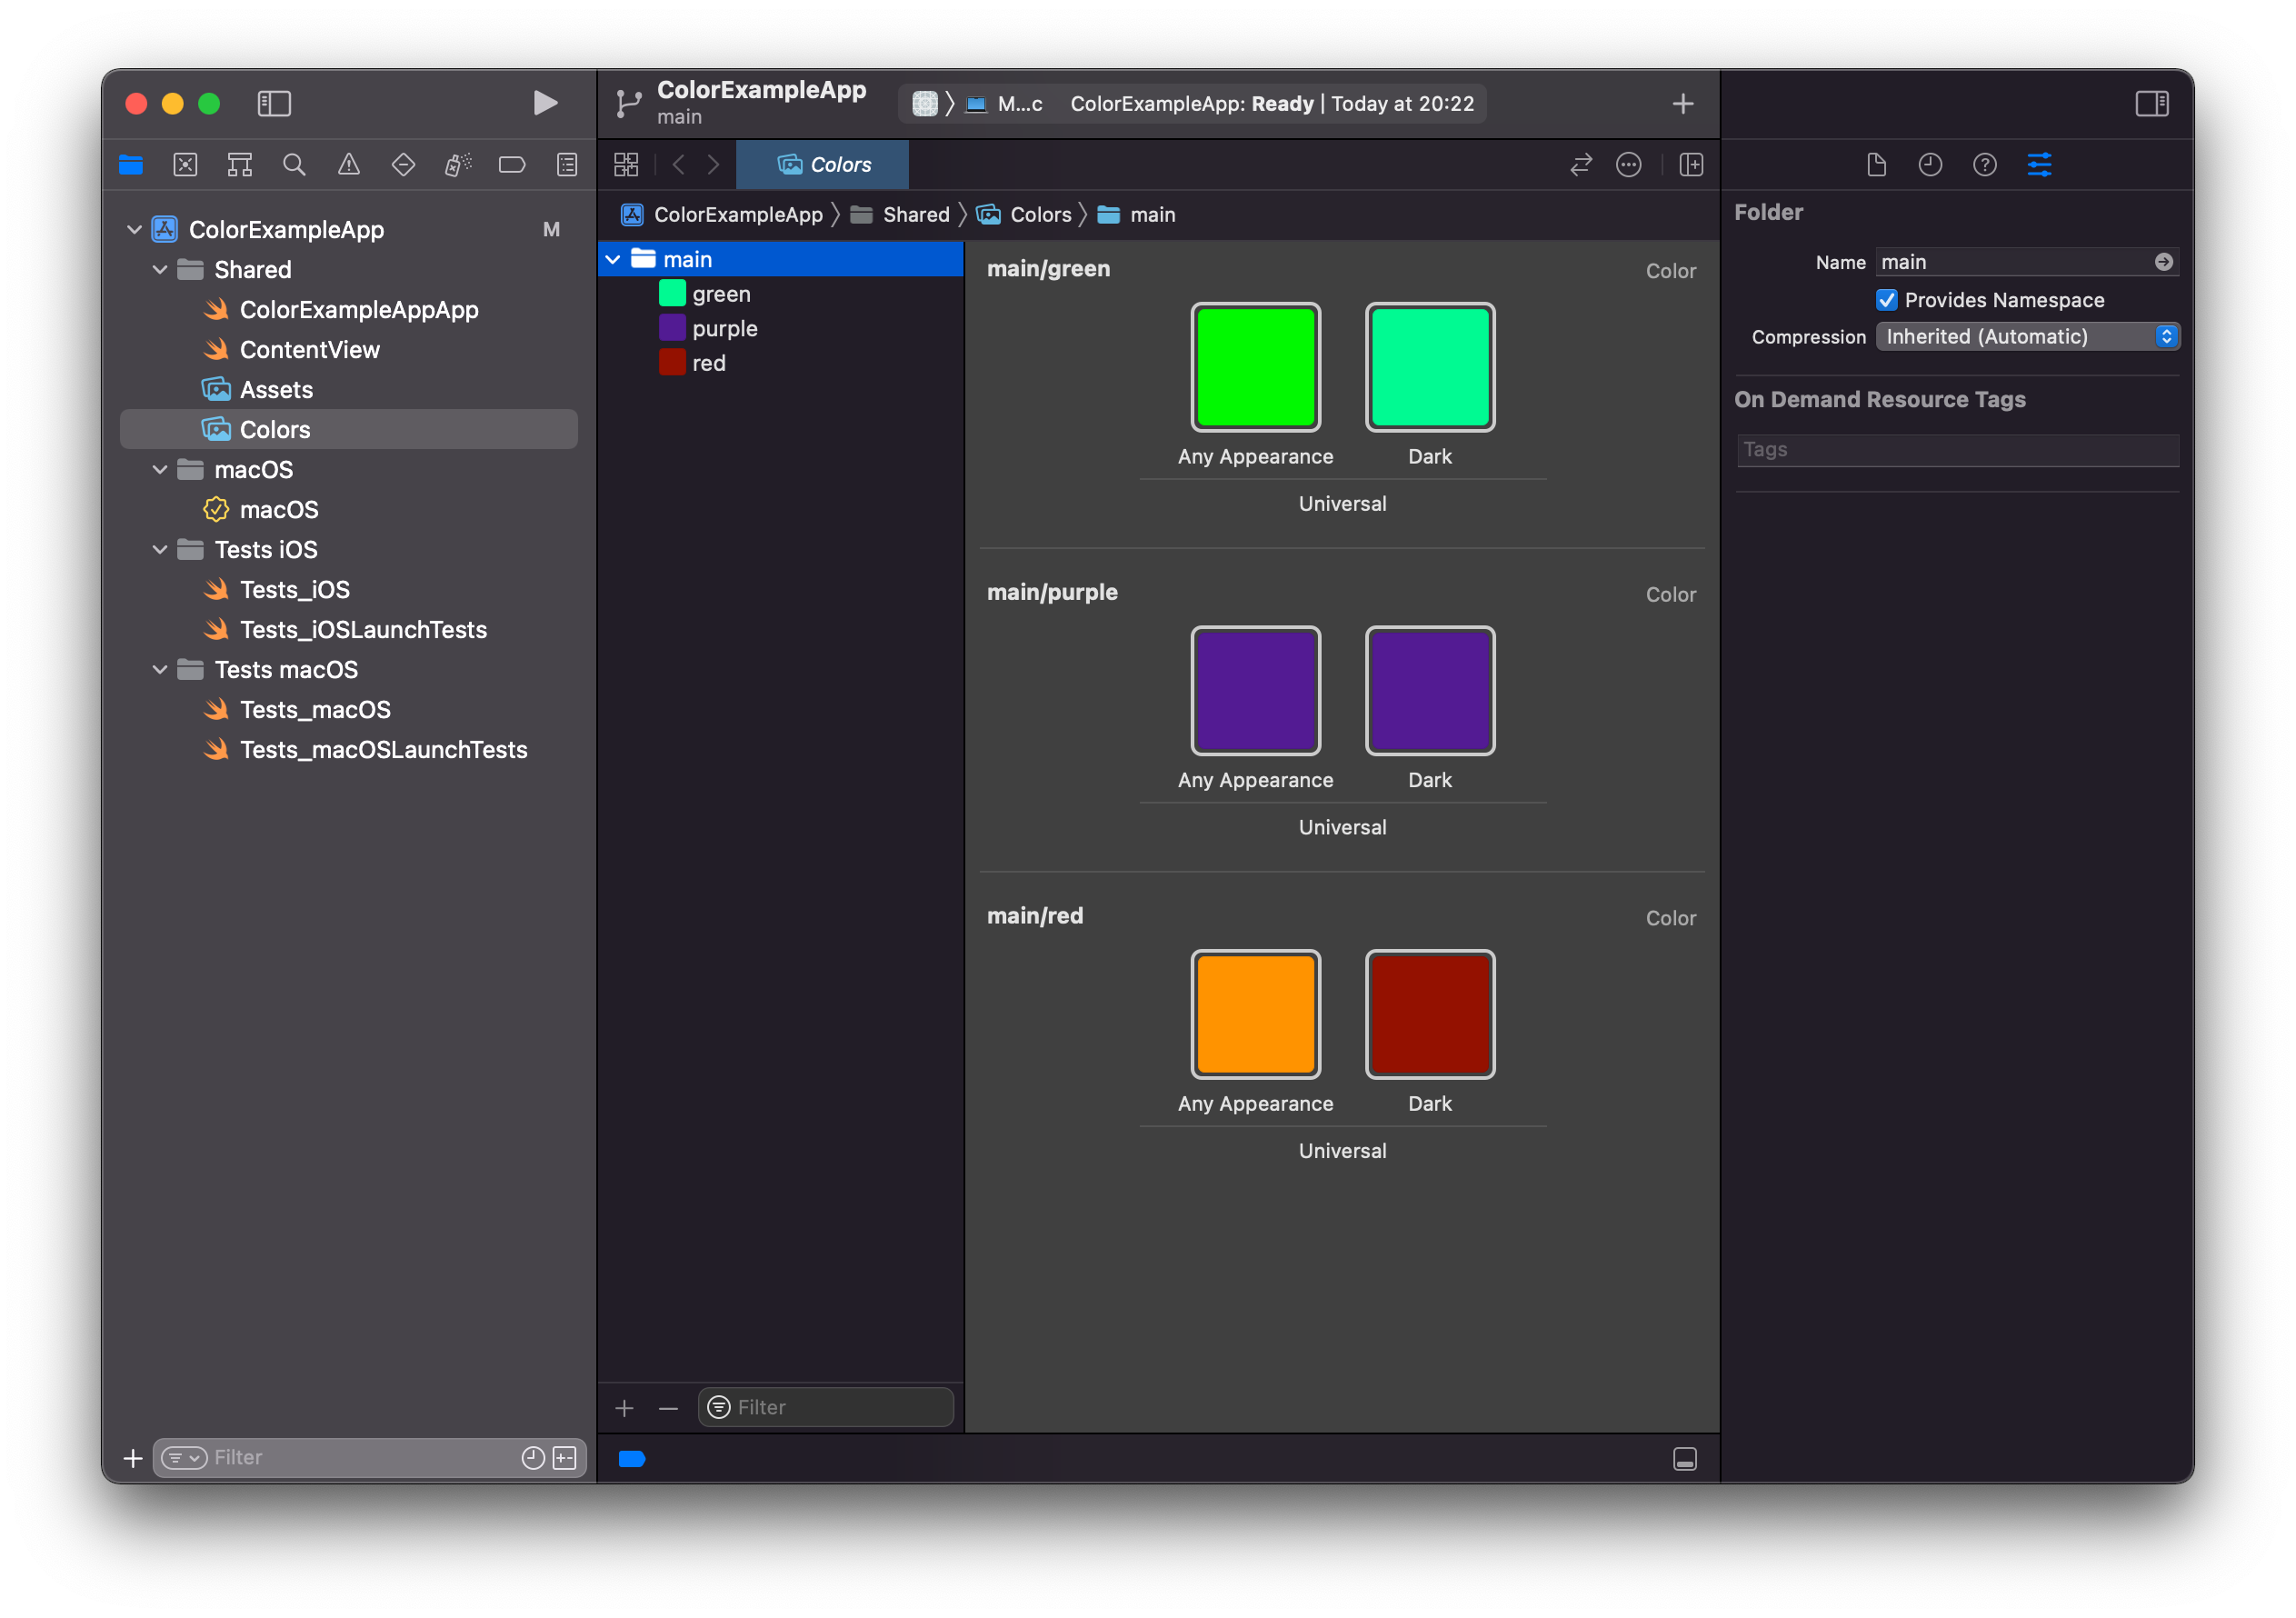
Our color names will now be main/green, main/purple, and main/red, which means that we can have multiple colors named red, just organized into different namespaces.
To support this new feature in code we will expand on our color instantiation a bit.
struct ColorNamespace<C: RawRepresentable> {
    private let colorType: C.Type? = nil
}

extension UIColor {
    static func named<C: NamespacedColor>(_ namespace: ColorNamespace<C>, color: C) -> UIColor {
        return UIColor(named: "\(C.namespace)/\(color.rawValue)")!
    }
}
Then we declare our different namespaces
protocol NamespacedColor: RawRepresentable where RawValue == String {
    static var namespace: String { get }
}

enum MainColors: String, NamespacedColor {
    static var namespace: String { "main" }
    case red, green, blue
}

enum SecondaryColors: String, NamespacedColor {
    static var namespace: String { "secondary" }
    case purple, yellow, orange
}
set up some short-hands to create namespaces
extension ColorNamespace {
    static var main: ColorNamespace<MainColors> { return ColorNamespace<MainColors>() }
    static var secondary: ColorNamespace<SecondaryColors> { return ColorNamespace<SecondaryColors>() }
}
and instantiate our colors using
let mainRed: UIColor = .named(.main, color: .red)
let secondaryPurple: UIColor = .named(.secondary, color: .purple)
This lets us declare our colors in a structured way in our asset catalogs and write very small amounts of code to let us have a compile-safe instantiation of our colors.
Bonus round – Tests
To add a final layer of safety we can also add tests to make sure that all our color code resolves to actual colors. To do this we will use the CaseIterable protocol, and make each color enum conform to it. This allows us to iterate over all cases and check that they instantiate correctly.
func testMainColors() throws {
    for color in MainColors.allCases {
        XCTAssertNotNil(UIColor.named(.main, color: color))
    }
}